Adding a Schedule to a Room

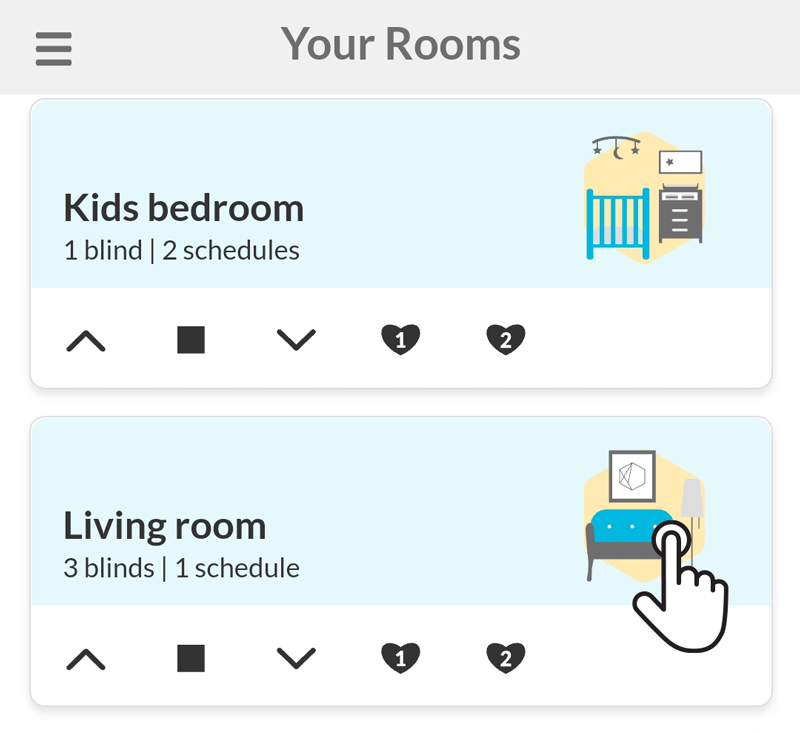
1 - Tap on the room
On Your Rooms page, tap on the room that you want to add a schedule.
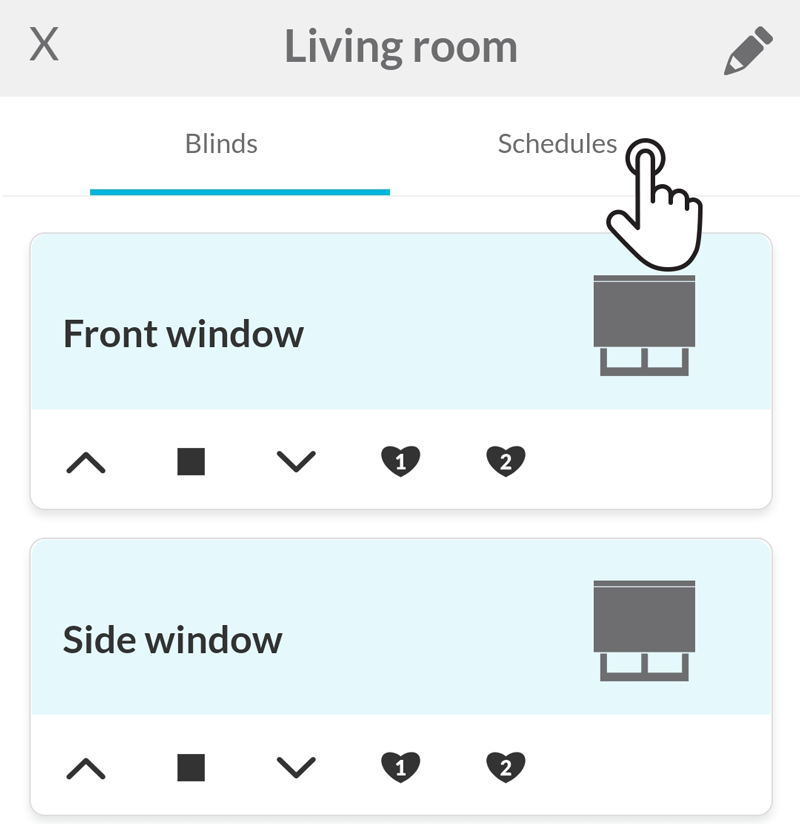
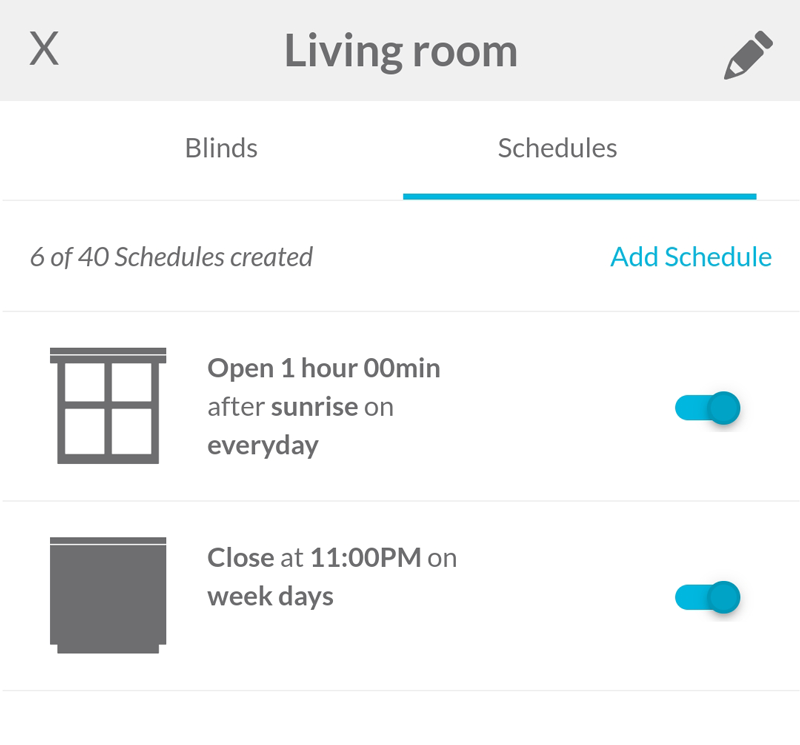
2 - Tap on the Schedule tab
In the top of the page, tap on the Schedules tab.
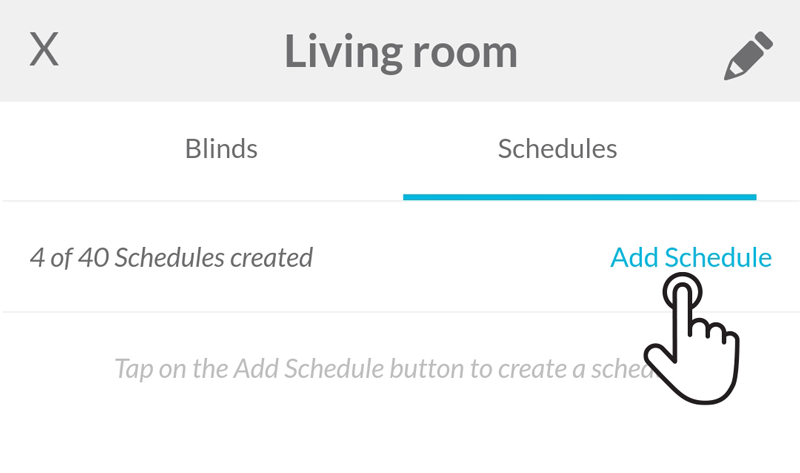
3 - Tap on Add Schedule
Right below the tab Schedules, tap on the blue button Add Schedule to create a new schedule.
4 - Set the schedule parameters and save
Choose the blind position, the time and select the days of the week the schedule will run.
To set a specific time schedule choose the on time button and then, enter the desired time of the day (e.g. 11:00PM).
To set a relative schedule, choose the at sunset or the at sunrise button. The app will show you the today’s sunset/sunrise time to the Smart Controller approximate geolocation. If you want to set the schedule for a certain amount of time before or after the sunset/sunrise time, enter the desired amount between 0:00h to 3:59h in the time field.
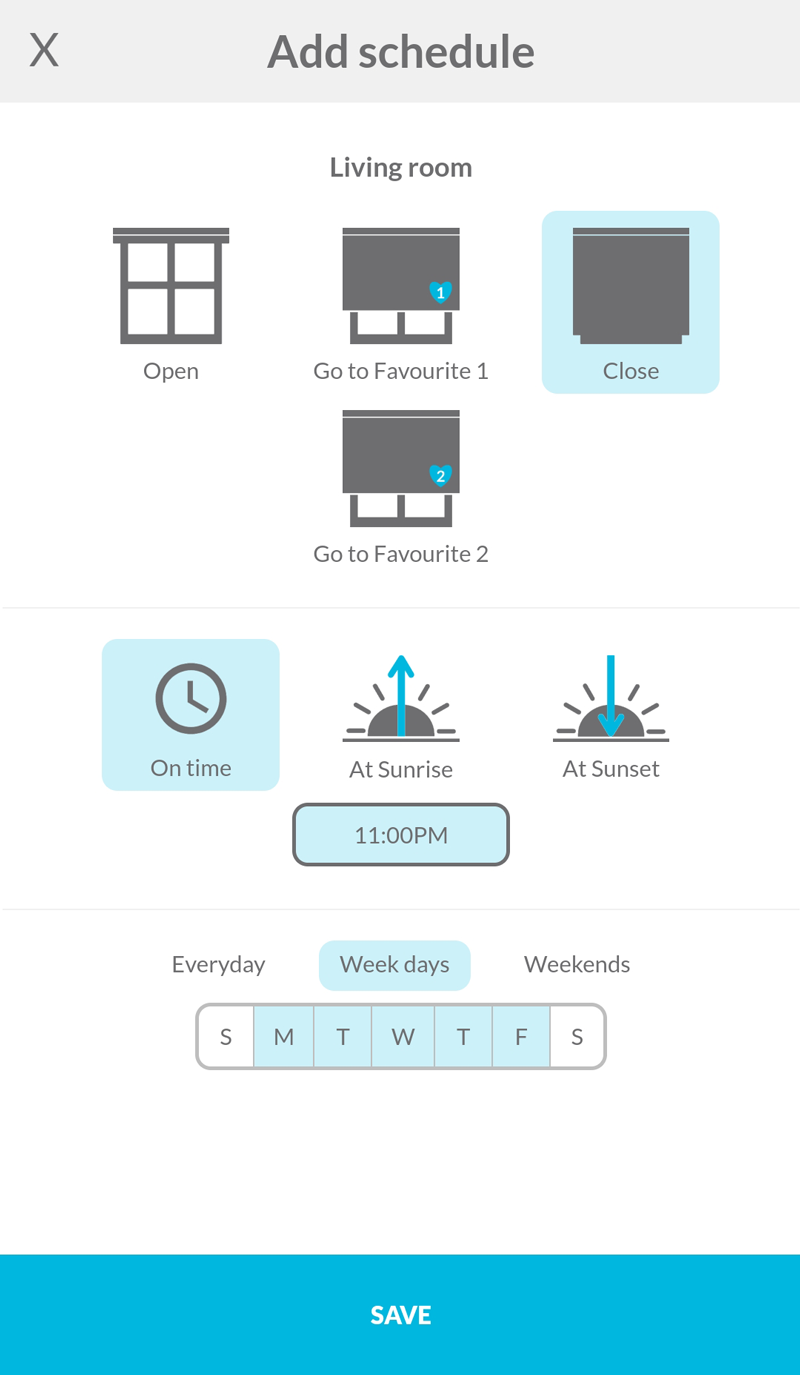
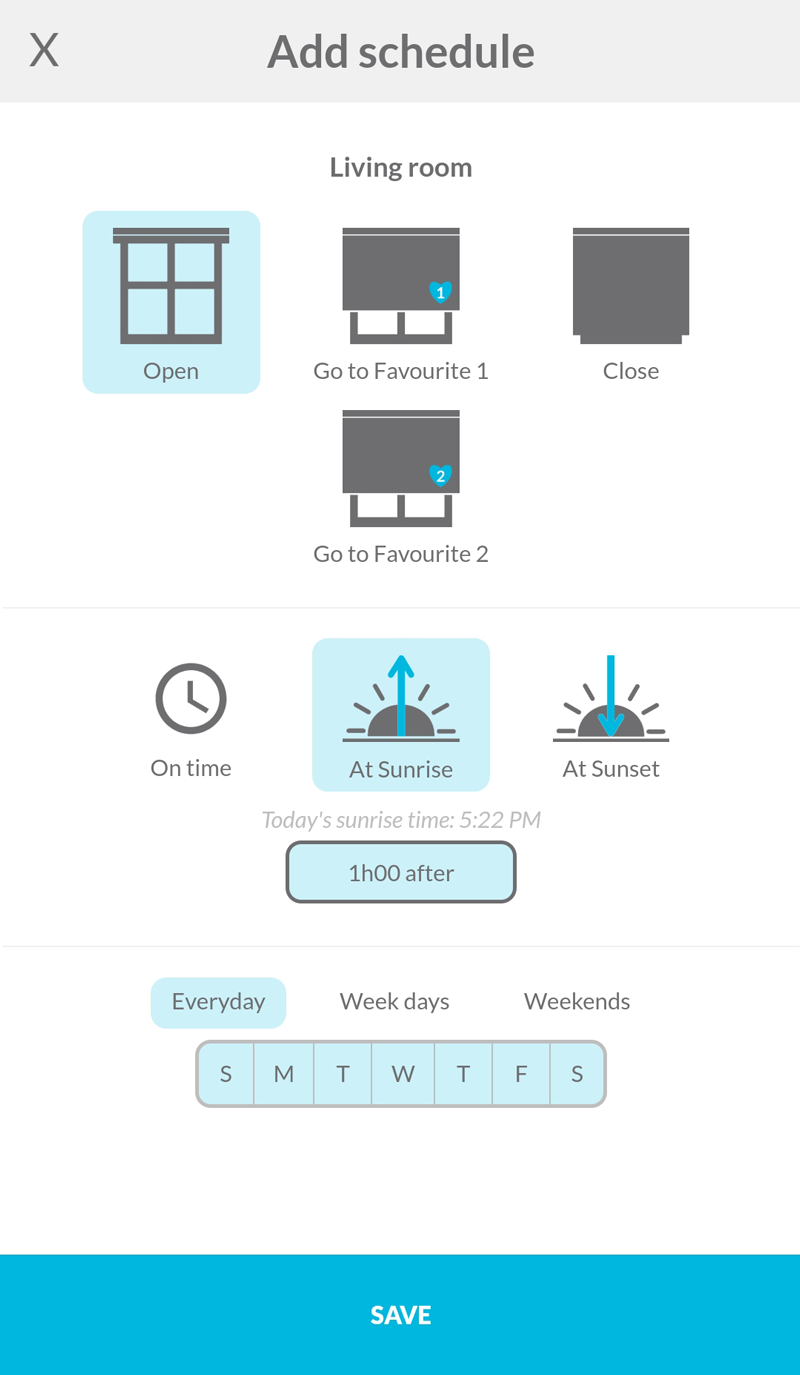
After tapping on the Save button, the schedule will be added to the room.
Related Articles
Assigning a Smart Controller to a Room
When adding a new room during the Add a blind process, accounts with more than one Smart Controller need to assign a particular Smart Controller to the room. Later, this information can be changed when editing a room. This feature is especially ...Adding a Blind
Take your time to decide how you want to map your physical house into rooms in the app to make automation and voice commands (to integrated voice assistants) easy and practical. For more information about this, see our Tips for grouping blinds to ...Adding a Blind using SBH20 Setup Code
Take the time to decide how you want to map your physical house into rooms in the app to make automation and voice commands (to integrated voice assistants) easy and practical. For more information, see our Tips for grouping blinds to match your home ...Deleting a Room and its Blinds
1 - Open the room page Tap on the room you want to delete and, therefore, permanently remove from your account. 2 - Tap on the pencil icon In the upper right corner, tap on the pencil icon to access the room's information page. 3 - Tap on the trash ...The schedule didn’t run automatically
For the command to be sent to the room's blinds, all the Smart Controllers of your account need to be online with Internet access at the scheduled time. Double-check if the schedule is enabled and ensure it has the intended AM/PM times. Besides that, ...